Introduction
Welcome to our comprehensive guide on couples’ DIY outdoor projects! In this blog post, we will delve into three exciting and rewarding activities that couples can undertake together to enhance their outdoor spaces and create lasting memories. These projects not only offer opportunities for creativity and teamwork but also allow you to reconnect with nature. Whether you’re beginners or seasoned DIY enthusiasts, this guide will provide you with detailed step-by-step instructions, helpful tips, and techniques to successfully complete these projects. So let’s get started on transforming your outdoor area into a haven of beauty and relaxation!
I. Building Birdhouses
A. The Joy of Birdhouse Building
Building birdhouses is a delightful activity that benefits both birds and your backyard ecosystem. By providing shelter and nesting spaces, birdhouses attract a variety of bird species, promote biodiversity, and offer opportunities for birdwatching and learning.
Step-by-Step Guide
To begin your birdhouse project, gather the materials needed for construction. You’ll need a sturdy and weather-resistant wood, such as cedar or plywood, screws or nails, a saw, a drill, sandpaper, and non-toxic paint or sealant. Make sure the materials are free from any chemicals that may harm birds.
Prepare the materials by cutting them into the required sizes. You’ll need panels for the front, back, sides, roof, and base of the birdhouse. Sand the edges and surfaces to ensure a smooth finish and prevent splinters.
Assemble the birdhouse by attaching the panels together. Start with the base and attach the sides, front, and back panels. Use screws or nails to secure the pieces, ensuring stability and durability. Make sure to leave an entrance hole for the birds.
After construction, paint the birdhouse using non-toxic paint or sealant. Choose colors that blend with the natural surroundings and provide camouflage. Apply multiple coats for added protection against the elements.
To make the birdhouse more appealing and functional, add finishing touches such as perches, predator guards, and removable panels for cleaning. Proper installation is crucial for the safety of the birds. Mount the birdhouse on a pole, tree, or building with the entrance hole facing away from prevailing winds and direct sunlight. Keep it at a height and location suitable for the bird species you want to attract.
To maintain the birdhouses, clean them regularly to remove debris and parasites. Replace any damaged parts and repaint as necessary.
B. Tips and Techniques for Successful Birdhouse Building
To attract specific bird species, consider their nesting preferences. For example, cavity-nesting birds like bluebirds prefer larger entrance holes, while wrens prefer smaller ones. Research the specific needs of the birds in your area to tailor your birdhouses accordingly.
To ensure the safety of the birds, protect the birdhouses from predators by adding predator guards or placing them out of reach. Avoid using toxic materials that may harm the birds or the environment. Provide suitable perches and adequate ventilation to maintain a comfortable and safe environment inside the birdhouse.
Consider the environmental impact of your birdhouses. Opt for sustainably sourced materials and non-toxic paints or sealants. Avoid placing birdhouses too close together, as this can lead to territorial disputes among birds.
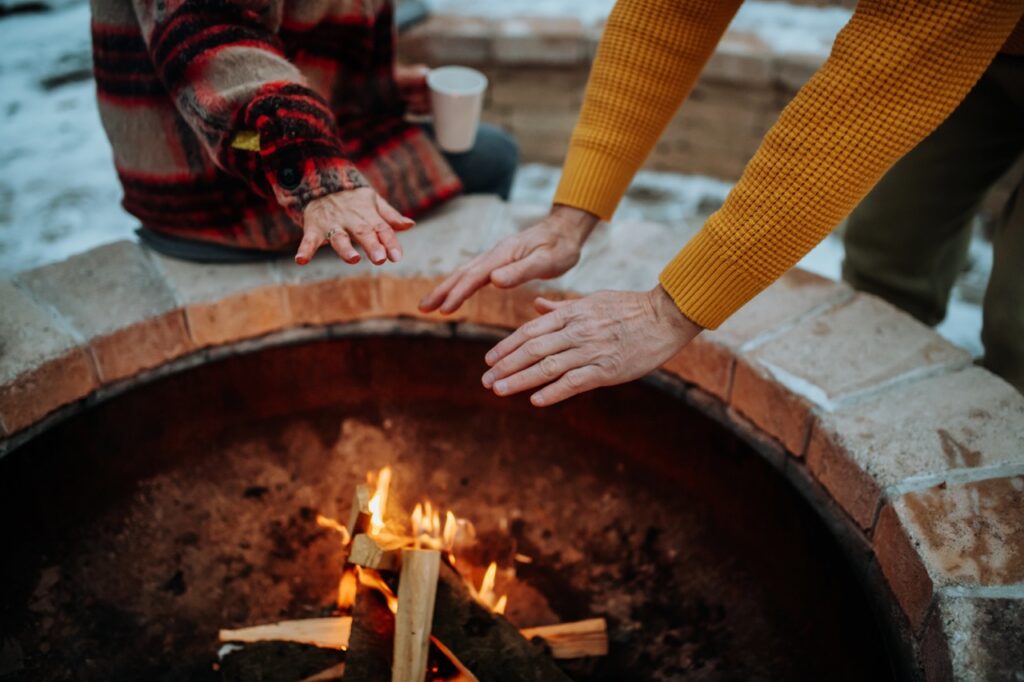
II. Creating Backyard Fire Pits
A. The Appeal of Backyard Fire Pits
Backyard fire pits provide a warm and inviting atmosphere, making outdoor gatherings cozy and memorable. They offer numerous benefits, including a focal point for socializing, a source of warmth during cooler evenings, and a place for outdoor cooking and toasting marshmallows.
Before starting your fire pit project, be aware of safety measures, legal considerations, and local regulations. Check with your local authorities to ensure you comply with any restrictions or permits required for building and using a fire pit in your area.
B. Step-by-Step Guide to Creating a Backyard Fire Pit
Creating a backyard fire pit requires careful planning and design to ensure safety and functionality.
Select an appropriate location: Choose a location that is away from structures, trees, and flammable materials. Ensure there is sufficient space for seating and that the fire pit is not in a high-traffic area.
Choose the right fire pit design: Select a design that suits your preferences and complements your outdoor space. Common options include in-ground fire pits, above-ground fire pits, and portable fire pits.
Gather the necessary materials and tools: You’ll need fire-resistant bricks or stones, gravel, a shovel, a level, and a metal fire pit ring or liner (if applicable).
Prepare the area: Clear the chosen area of any vegetation or debris. Dig a shallow pit and create a level base.
Construct the fire pit: Begin by placing a layer of gravel in the pit for drainage. Stack the fire-resistant bricks or stones in a circular or square shape, ensuring stability and a secure fit. Use a level to ensure the fire pit is even.
Add finishing touches and safety features: Consider adding a protective screen or spark guard to prevent embers from escaping. Install seating options around the fire pit for comfort and convenience.
C. Tips and Techniques for a Perfect Backyard Fire Pit
To maintain a safe and enjoyable fire pit experience, follow these tips:
- Regularly inspect and clean the fire pit to remove ashes and debris.
- Keep a fire extinguisher or a bucket of sand nearby for emergencies.
- Use dry and seasoned firewood to minimize smoke and ensure efficient burning.
- Avoid using flammable liquids to ignite the fire.
- Supervise the fire at all times and extinguish it completely before leaving the area.
- Enhance the ambiance with suitable lighting options, such as string lights or solar-powered lanterns.
- Create comfortable seating arrangements, such as outdoor chairs or benches, to encourage relaxation and conversation.
- Consider additional accessories like firewood storage solutions, outdoor rugs, or heat-resistant cooking surfaces for versatility and convenience.
- Explore a range of fire pit recipes, from classic s’mores to grilled vegetables and meats, to elevate your outdoor cooking experience.
III. Setting Up Home Gardens
A. The Beauty and Benefits of Home Gardens
Home gardens offer a sanctuary where you can connect with nature, cultivate your own plants, herbs, and vegetables, and reap numerous benefits.
Gardening allows you to enjoy fresh and flavorful produce, save money on grocery bills, reduce your environmental impact, and provide a source of relaxation and stress relief.
B. Step-by-Step Guide to Setting Up a Home Garden
Setting up a home garden requires careful planning, soil preparation, and plant selection.
Design your garden layout: Consider the available space and sunlight exposure. Decide on the garden shape, paths, and the arrangement of beds or containers.
Prepare the soil: Test the soil pH and fertility and make any necessary amendments. Remove any weeds, rocks, or debris and till the soil to improve its structure and drainage.
Select and start seeds or acquire seedlings: Choose plants that are suitable for your climate and gardening goals. Start seeds indoors or purchase healthy seedlings from local nurseries or online sources.
Planting, watering, and fertilizing techniques: Follow planting guidelines specific to each plant, considering spacing, depth, and watering needs. Establish a watering routine and provide adequate moisture for optimal plant growth. Use organic fertilizers or compost to nourish the soil and promote plant health.
Manage pests, weeds, and disease control: Implement organic pest and weed management strategies, such as crop rotation, companion planting, and using natural predators. Monitor the plants regularly for signs of disease and treat any problems early.
Harvest and storage: Harvest your produce at the appropriate stage for the best flavor and nutritional value. Learn proper techniques for storing or preserving your harvest to ensure long-lasting freshness.
C. Tips and Techniques for Successful Home Gardening
- Learn about companion planting, crop rotation, and succession planting for maximizing productivity and pest control.
- Invest in high-quality tools and maintain them properly for durability and ease of use.
- Use mulch to conserve moisture, suppress weeds, and regulate soil temperature.
- Compost kitchen scraps and yard waste to create nutrient-rich compost for your garden.
- Experiment with vertical gardening, container gardening, or raised beds if you’re short on space.
- Engage in regular garden maintenance, including pruning, weeding, and checking for pests and diseases.
- Consider creating a pollinator-friendly garden by including plants that attract bees, butterflies, and other beneficial insects.
- Embrace the trial-and-error nature of gardening and view any challenges as opportunities for learning and growth.
Conclusion
We hope this comprehensive guide helps you and your partner embark on a rewarding DIY journey. These projects are not only engaging and enjoyable but also result in tangible improvements to your outdoor space. Remember, the key to successful DIY projects lies in careful planning, patience, and teamwork. Enjoy the process, and most importantly, have fun!